After raising seven children, I finally have a space I can call my own. My last daughter living at home, moved to Haiti in early February to serve as a missionary. I didn't waste any time starting the renovation! I was sad to see her go, so this was my pick-me-upper. I'm a work-at-home Nana so I needed a space that serves as office, craft room, and area where I can maintain the grandchildren when I keep them. My craft stuff has been discombobulated for several years. I was on a hiatus for about 4 years while I completed my master's degree. It was time to get everything back together in one place. Last spring, my hubby suggested I take an area of our sun room so I worked all last spring to set up a "spot." I was able to reunite a lot of my stuff, but there were still items stashed in closets. I pretty much have most of it out now. What I don't have out, I have a place for as I am able to bash the closets and organize/get rid of the rest.

I had already accumulated a lot of storage items, so I decided to lean on the frugal side, and made do with what I had for the most part. My biggest investment was the IKEA Kallax shelf unit that I have wanted for some time now. I used tables, cabinets, shelves that we accumulated from school auctions and thrift store finds. I also invested in the Fintrop rail/hooks from IKEA. Although I'm still tweaking here and there, I pretty much have everything arranged where it ended up functioning best for me. So, ready for the tour?
Here is where I keep my scraps. They are in rainbow order from pink to purple/brown, top to bottom. I am keeping my Cuttlebug here, and the plates are in the hanging pocket on the side, along with my most-used dies. The rest of the dies and embossing folders are in a bin on the Kallax shelves.

To the right of the drawers, I have a pocket folder hanging where I
keep paper/photos that I plan to scrap in the future, or I'm in the
process of scrapping. This is a dormer closet that stores stuff for one of my kids that lives out of the country.

Here's where you can see most of the wall. Just to the left of the drawers, is my Kallax cube shelf. I have all sorts of stuff stored here from paper, albums, projects, flowers, ribbons, etc. I also have office supplies stored in here, so it holds a wide range of items. Further down, you can see my paper rack. I've this rack foreeeeeeever! On the left is my cardstock in rainbow order, and at the bottom and right are papers organized by theme or designer. Last year I went through photos, embellishments, and paper and came up with theme names and they are all categorized under those theme names. This way I can easily gather my pics, paper, embellishments.


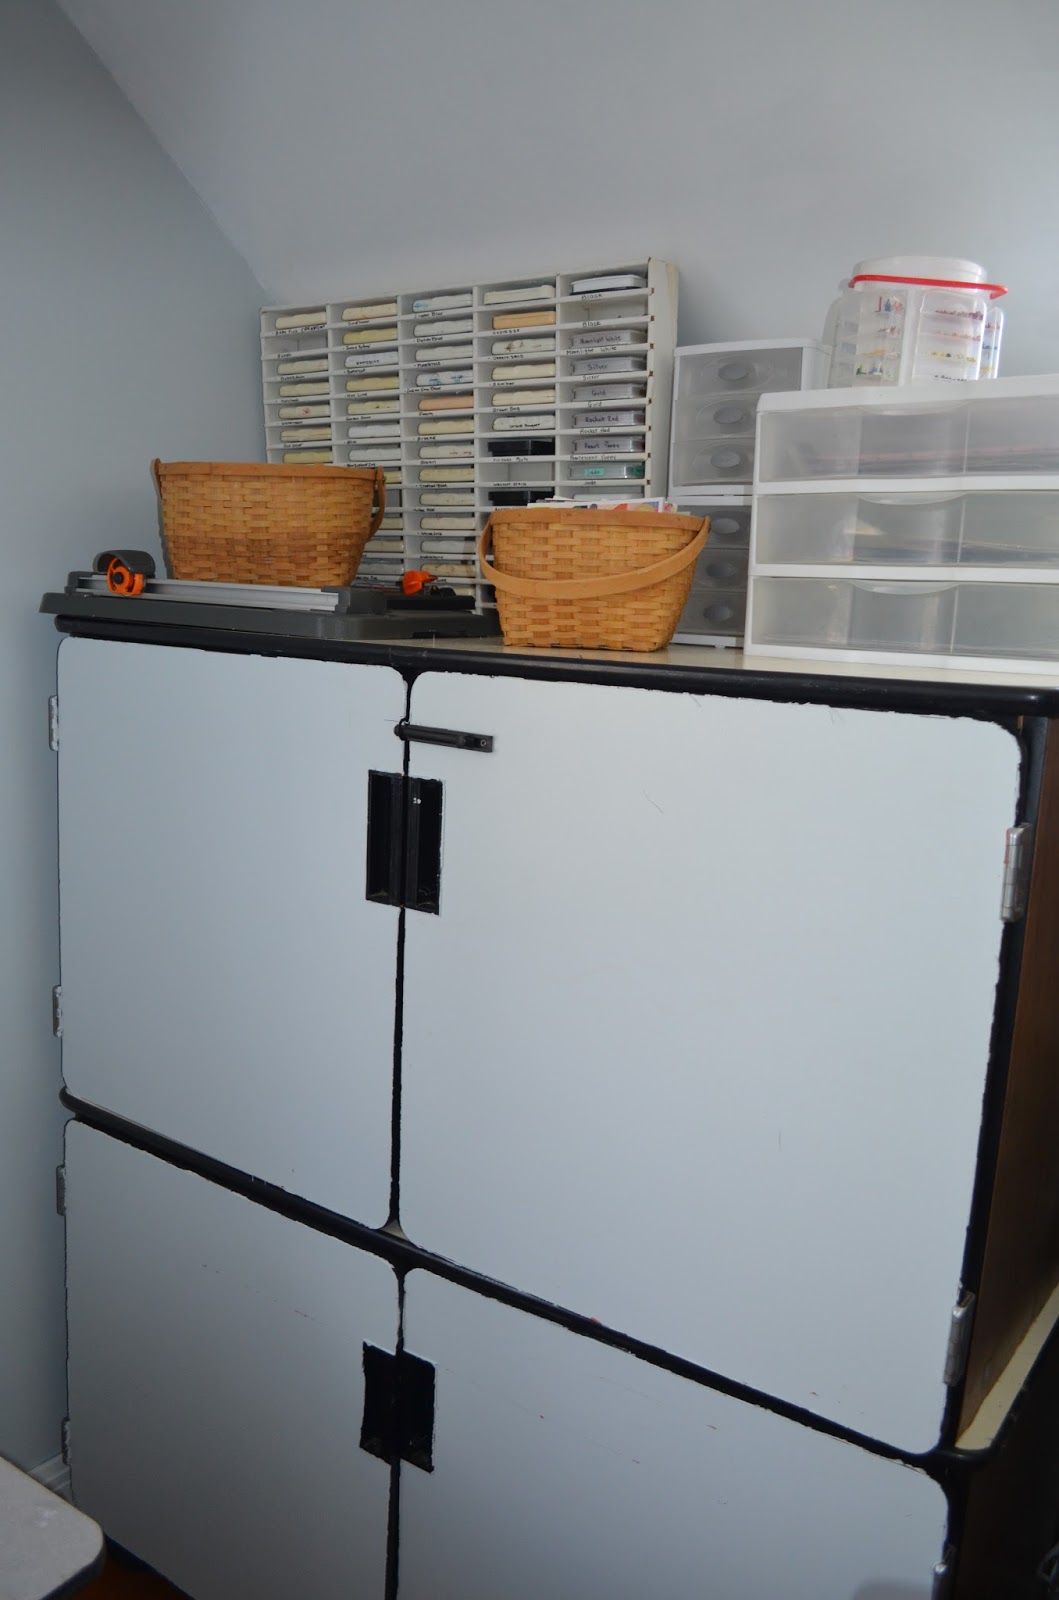
At the end of the wall, I have two cabinets stacked that I acquired at a school closing auction. These were from the art room. On the top, I have my ink pads, a basket with my 6x6 paper pads, large paper trimmer and drawers that hold stencils, and misc. large embellishments. I have a little thing on the top that holds brads and old eyelets. Well see........
Inside the cabinet I have containers that I've had for a long time. I decided to keep them since so much of my stuff was already there. Inside I also have a unit that has my basic white and black paper, and on top is my Copic markers. The blue drawers hold my reindeers.
I have two carts. One with drawers my mother gave me years ago that serves as an embellishment cart. The top bin is where I keep embellishments that I have categorized by theme once I've used them up in a kit. The other is a RASKOG cart from IKEA that has tools and media supplies. I have a basket in the top that I got at Hobby Lobby that has been great to just drop stuff in as I need when I'm scrapping.

Here is an overview of the room. Now to the left side of the room..... I made a "U" shape with my tables so that I can pivot and have plenty of workspace. I'm quite a mess when I'm crafting! I finally have my Cricut and computer united on one area so I'm hoping to use it more now. On the top right is a letter holder where I keep my papers and embellishments I'm currently using. I have storage items under my tables to keep stuff I use a lot, or just a place to set things down off my tables.
This is an acrylic shelf unit I purchased when Goody's was closing in our area. I have a hook that holds my Cricut mats, and some of my clear stamps, as well as heat tools and this is a place to set my ATG gun down when I'm not using it. I have a box in the corner that I use to place paper to do any spraying that might get too messy for my desk. Under another table is a bin that holds kits I still need to kill.
Here is a view of my desktop. This corner is dead space because I can't reach the far corner. My center worktable is 35" deep, and I sacrificed the corner for a deeper work area. I think my printer will work out ok there. The empty wall spaces will be filled with new creations yet to come! Sitting on my desk, I stacked 2 drawer units from Lowe's that hold frequently used small embellishments.
Here is a view of the left side of my desk area. I am keeping my 8 1/2 x 11 Cardstock here because I am trying to remember to use this paper for matting my photos instead of using up my 12x12. My Thirty-One file holds some of my office paperwork. Here is where I ended up placing the Fintrop rail so that I could reach it lol. I have Thickers in one of the Thirty-One pocket.

At the end of the desk, is the shelf unit I purchased at the Goodwill a few years ago. As soon as I spotted it, I KNEW it was perfect for punches! I mentioned earlier that I have a small space where the little ones can play. My son was testing out the play space with one of my granddaughters! On the back wall is a love seat. So, there you have peek into my creative space!
I plan to be better about posting my layouts in the future. I'm on a mission to bash my stash this year. My goal is to complete a layout a day. I've managed to accomplish 45 layouts so far. I'm hoping to get my mojo back in my new craft space. I would love for you to join me on this new crafting journey! Thanks for looking!


 I also entered this layout in the CSI Challenge Case File #260. I have stalked their challenges for awhile now, and I finally mustered the courage to enter the challenge. For this challenge. I used the color theme with sky blue/buttercup yellow/navy; flowers; and added a camera. I didn't focus a whole lot on the travel theme, although we were on a trip when the photo was taken. I had a lot of fun creating this summer layout!


 I had already accumulated a lot of storage items, so I decided to lean on the frugal side, and made do with what I had for the most part. My biggest investment was the IKEA Kallax shelf unit that I have wanted for some time now. I used tables, cabinets, shelves that we accumulated from school auctions and thrift store finds. I also invested in the Fintrop rail/hooks from IKEA. Although I'm still tweaking here and there, I pretty much have everything arranged where it ended up functioning best for me. So, ready for the tour?
 To the right of the drawers, I have a pocket folder hanging where I


 Here is an overview of the room. Now to the left side of the room..... I made a "U" shape with my tables so that I can pivot and have plenty of workspace. I'm quite a mess when I'm crafting! I finally have my Cricut and computer united on one area so I'm hoping to use it more now. On the top right is a letter holder where I keep my papers and embellishments I'm currently using. I have storage items under my tables to keep stuff I use a lot, or just a place to set things down off my tables.


